Category: Cutting Boards

  • Maple vs Walnut Cutting Boards: Hardness, Looks and Staining

    Maple vs Walnut Cutting Boards: Hardness, Looks and Staining

    The short version

    • Hard maple (1,450 Janka) is harder than black walnut (1,010 Janka), but both are safe for knives and both are closed-grain hardwoods suited to food.
    • Maple is pale and shows stains more. Walnut is dark brown and hides them, but it also hides crumbs and cut marks you may want to see.
    • Walnut boards usually cost more than maple boards of the same size and construction because the lumber costs more.
    • Neither wood is food-safe in a way the other is not. Oiling and cleaning habits matter more than the species.
    • If you cannot decide, a maple and walnut combination board gives you both looks in one piece.

    Maple and walnut are the two woods most people end up choosing between for a cutting board, and it is a fair contest. Both are dense, tight-grained North American hardwoods that have been used for chopping blocks for generations. The real differences are hardness, color, how each one handles stains, and price.

    This is a straight comparison from a shop that builds boards in both. If you want the wider field of woods, including cherry and the ones to avoid, our guide to the best woods for cutting boards covers them.

    Hardness: Maple vs Walnut on the Janka Scale

    The Janka test measures how many pounds of force it takes to push a steel ball halfway into a piece of wood. Hard maple, also sold as sugar maple, rates about 1,450 lbf. Black walnut rates about 1,010 lbf.

    In practice, that makes maple the tougher surface. It resists deep knife scoring and dents from a dropped pan better than walnut does. Walnut sits in a comfortable middle: hard enough to last for years, soft enough that it is gentle on your edge.

    TraitHard MapleBlack Walnut
    Janka hardness~1,450 lbf~1,010 lbf
    GrainClosed, fine, evenClosed to semi-open, a bit more figure
    ColorCream to light tanChocolate to dark brown
    Shows knife marksYes, in light scratchesLess visible
    Shows food stainsMoreLess
    Relative priceLowerHigher

    Hardness gets overplayed in cutting board conversations. A knife is steel, and both woods are far softer than steel. The bigger factor for edge life is whether the board is end grain or edge grain, which we compare in end grain vs edge grain cutting boards.

    How They Look and Age

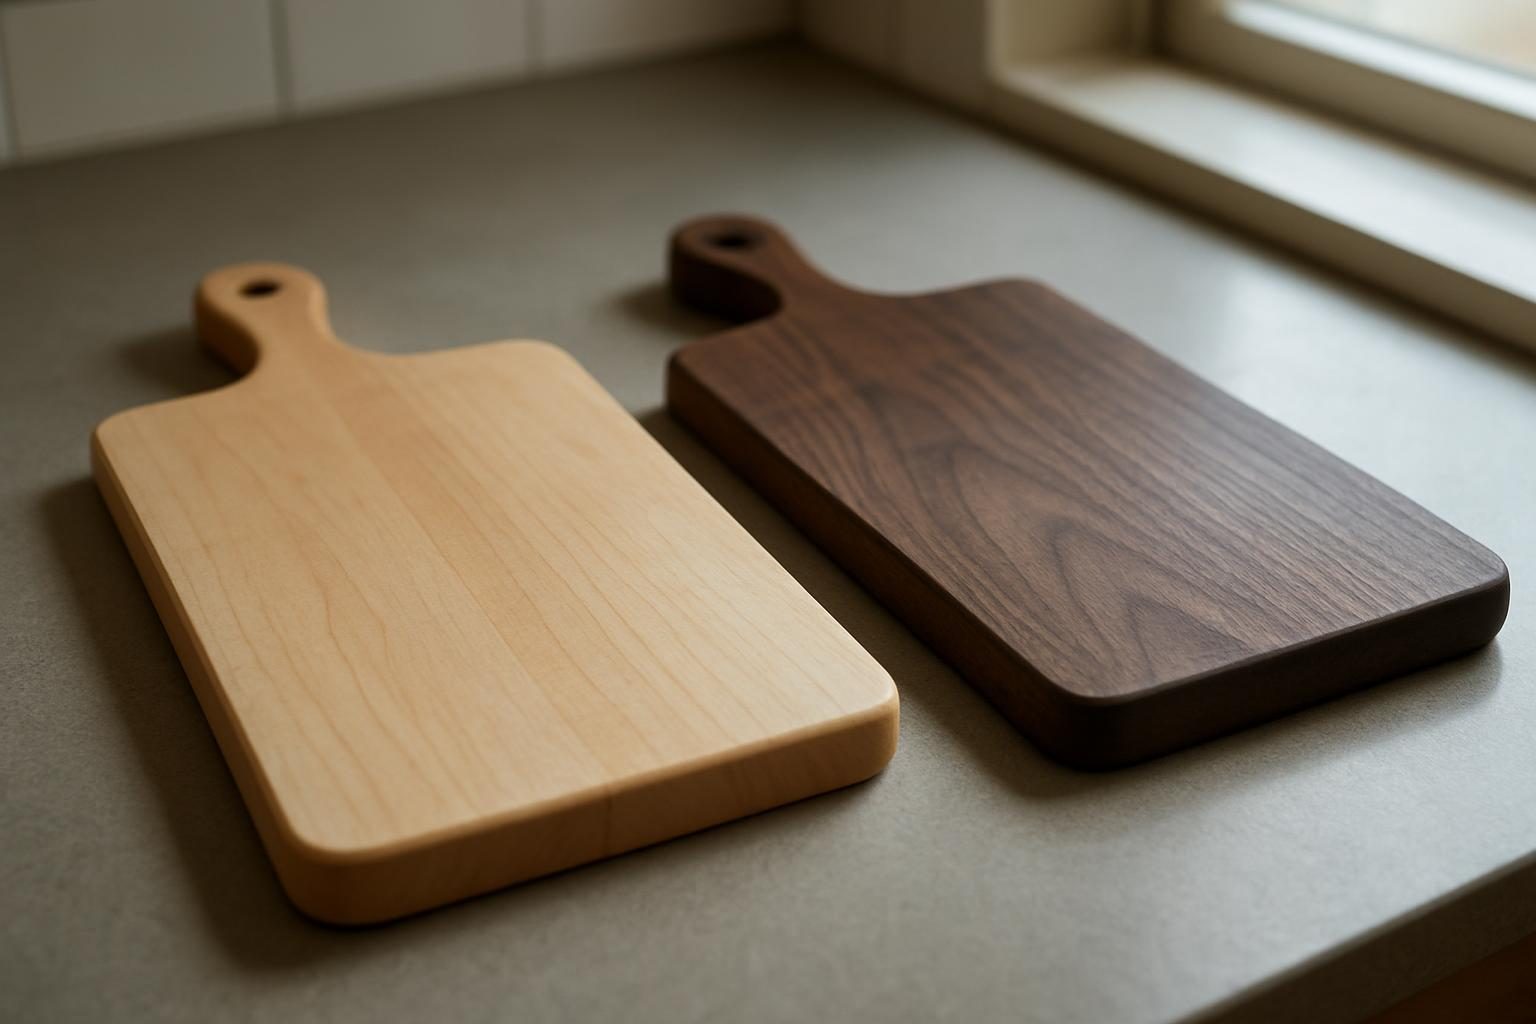
    Maple is the clean, bright option. It has a fine, even grain that reads as modern and neutral, and it pairs well with white countertops and light cabinetry. Over time it warms to a soft honey tone, especially with regular oiling.

    Walnut is the dramatic one. The color runs from medium brown to near-black, sometimes with purple or gray streaks and occasional lighter sapwood. It looks rich on a dark countertop and holds up visually in a busy kitchen.

    Walnut does lighten slowly with sun exposure, so a board that lives on a sunny counter will shift a little over the years. Maple tends to move the opposite direction, deepening to a warmer tone. Neither change is a defect, just wood being wood.

    Pick maple if you want to see the board work, and walnut if you want the board to look good while it works.

    Staining: Which One Shows Wear Less?

    This is where the two woods feel most different day to day. Maple is pale, so beet juice, turmeric, red wine and coffee leave visible marks. They are surface stains and usually fade or sand out, but they do show.

    Walnut hides most of that. A dark board can sit through a week of tomato sauce and berry prep and still look uniform. The tradeoff is that you also lose the contrast that shows when a board needs a proper wash, so build a cleaning habit instead of waiting for it to look dirty.

    For both woods, the same basics keep a board healthy:

    • Wash with mild soap and warm water right after use, then dry it standing on its edge.
    • Never soak a board or run it through the dishwasher.
    • Oil it with food-grade mineral oil whenever it looks dry or pale.
    • Sand lightly and re-oil if a stain bothers you.

    Our walkthrough on how to oil and clean a wood cutting board has the full routine.
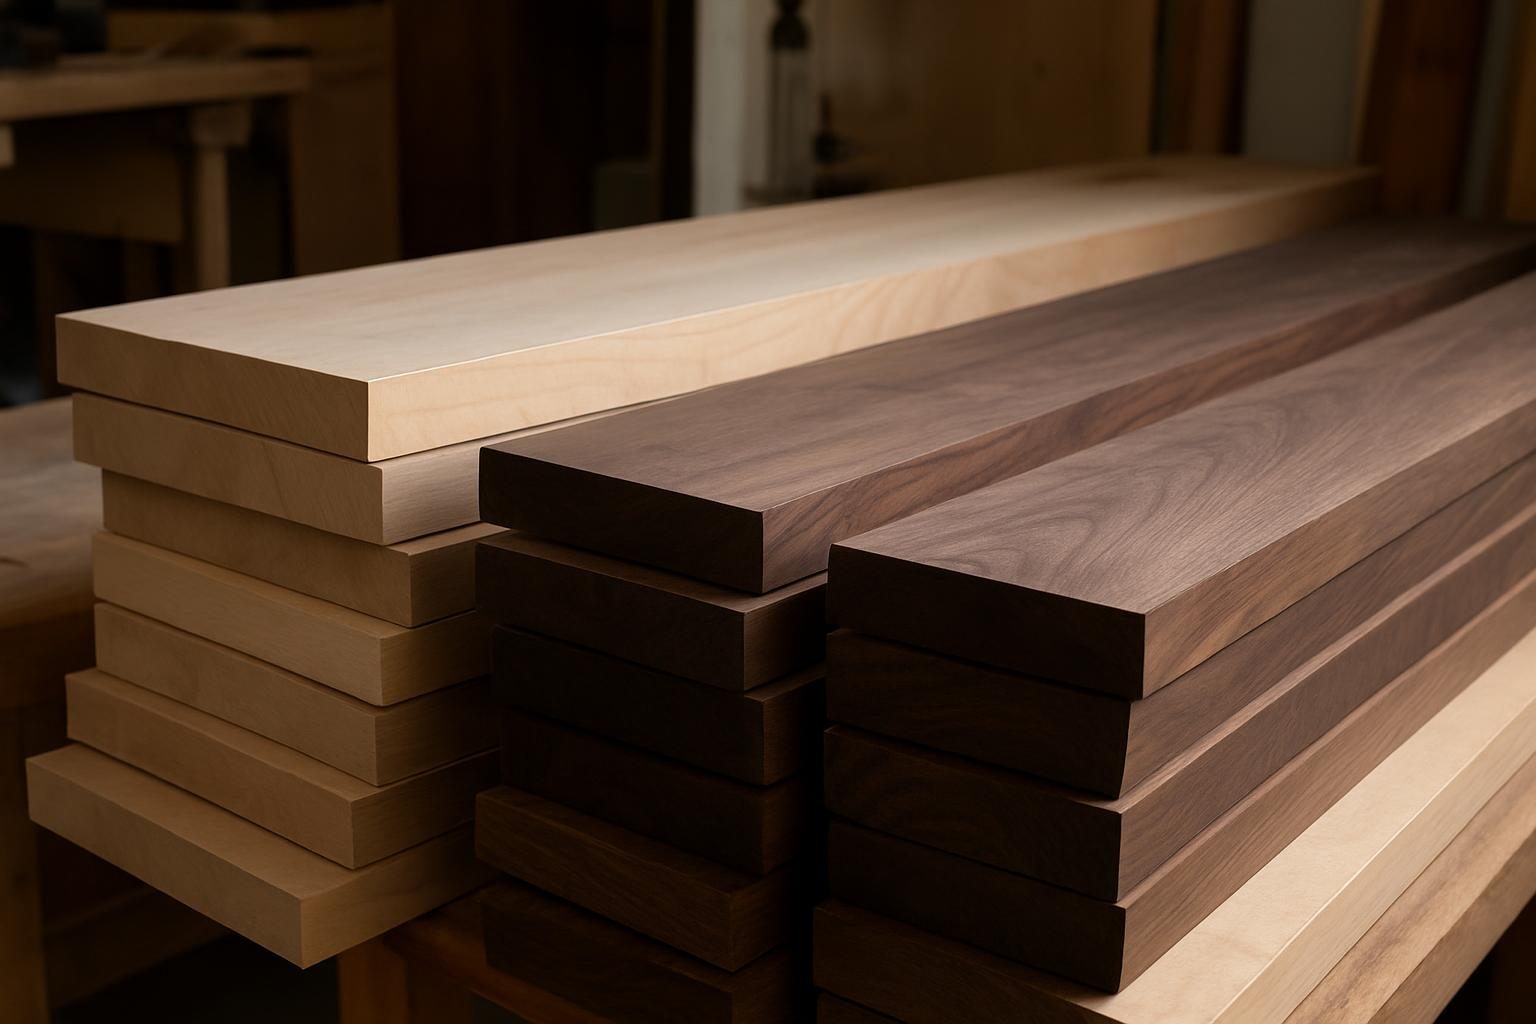
    Close-up of maple and walnut wood grain compared

    Should You Stain a Cutting Board?

    Short answer: no. Wood stains and dyes are not made for surfaces that touch food and take knife cuts, and a cutting board gets sanded and re-oiled over its lifetime, which exposes bare wood again. Skip any finish that is not labeled food-safe.

    If you want a darker board, buy walnut instead of staining maple. It gives you depth of color that runs all the way through the wood, so a scratch never reveals a pale layer underneath. That is the honest reason people choose walnut over maple, and it is a good one.

    The only finish a cutting board needs is a food-safe oil, sometimes paired with a beeswax blend for a bit more water resistance. Both woods take oil well and look noticeably richer after the first few coats.

    Shop tip: If you are torn, ask for a board with both woods in it. Alternating maple and walnut strips in an end grain pattern gives you the contrast of a checkerboard and the practical benefits of each species.

    Price and Build Differences

    Walnut lumber costs noticeably more than hard maple, and that carries through to the finished board. Our cutting boards start at $95, and walnut versions of the same size and construction generally land above the maple ones. Board size, thickness, and whether it is edge grain or end grain move the price more than the species does.

    Thickness is worth caring about. A board around 1.5 inches thick stays flat, resists warping, and has some heft on the counter. Thinner boards are lighter but more likely to cup if they get wet on one side.

    Here is a quick guide to which wood tends to suit which situation:

    • Busy family kitchen, lots of daily chopping: Maple. It is the tougher surface and the lower price makes it easy to replace in ten years.
    • Serving boards and charcuterie: Walnut. The dark color shows off cheese, fruit and cured meat.
    • Gift: Walnut or a combination board. It photographs well and feels like an upgrade.
    • Dark countertops and cabinets: Maple for contrast, or walnut for a tonal look.

    The best cutting board is the one you will actually wash, dry and oil.

    Which One We Would Pick

    For a primary chopping board that sees daily use, hard maple is the practical choice. It is harder, cleaner looking, and easier on the budget. For a board that sits out on the counter and doubles as a serving piece, walnut earns its higher price.

    Both are safe for food and both will last for years when cared for properly. If you are weighing walnut against another popular furniture wood, our comparison of walnut vs white oak is a useful companion, and the shop’s wood guide lays out the species side by side. You can see current options on our cutting boards page.
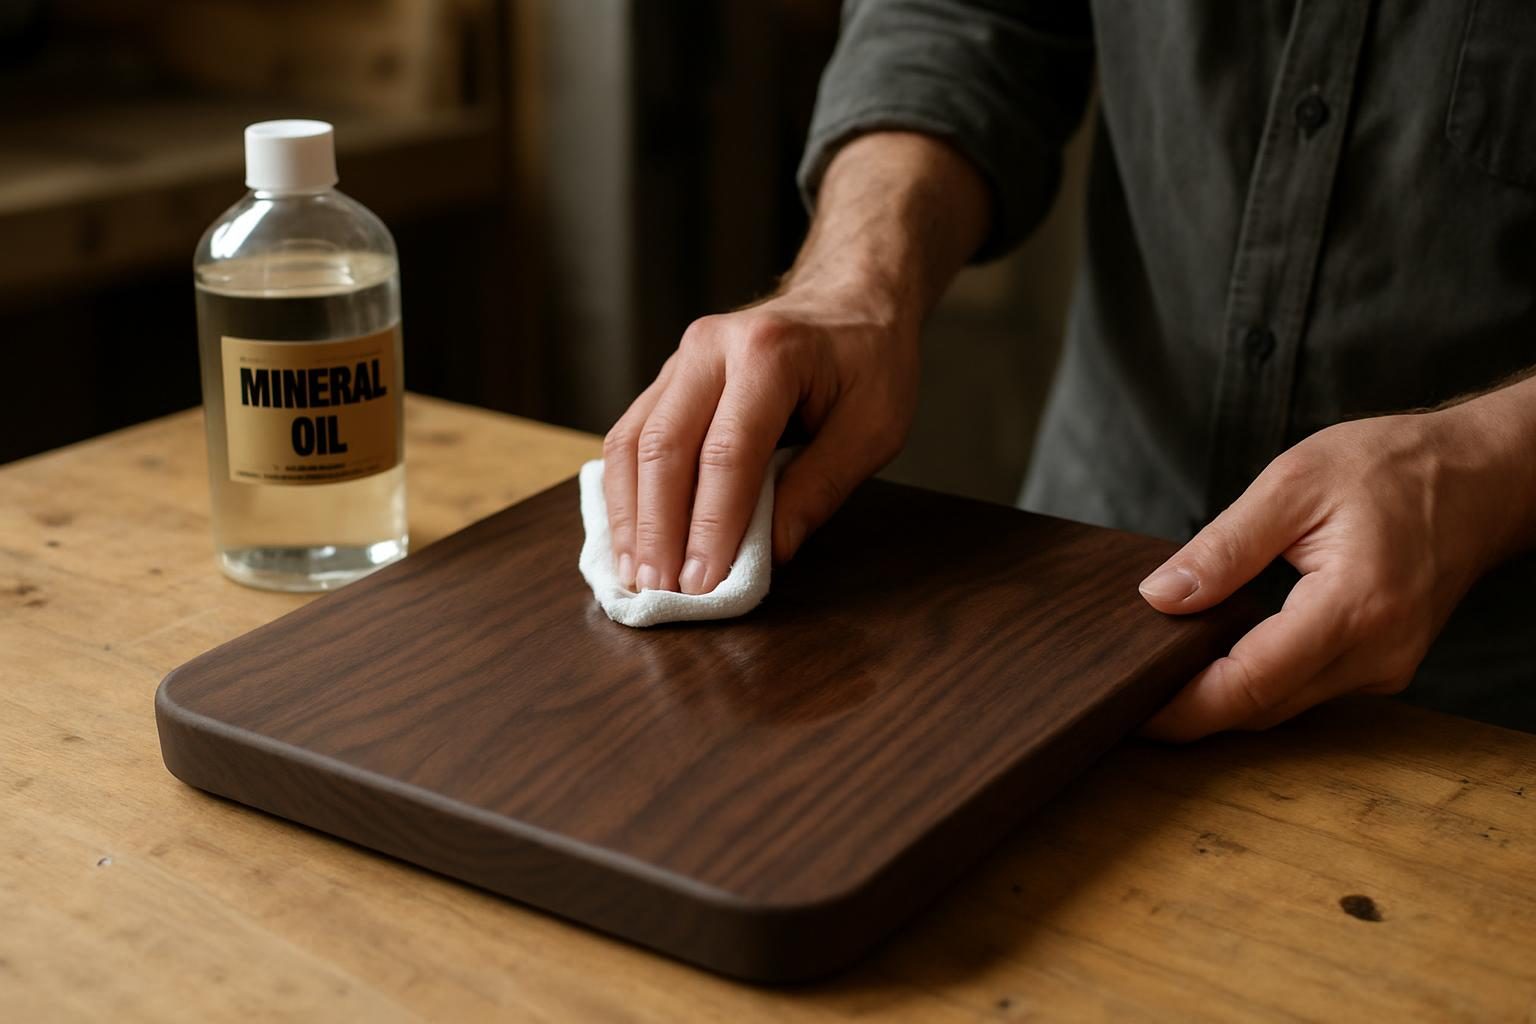
    Oiling a walnut cutting board with food-safe mineral oil

    Boards ship anywhere in the US. If you are in Jacksonville or elsewhere in Onslow County, we also handle local pickup, which is easy to arrange if you are ordering furniture alongside a board.

    FAQ

    Is maple or walnut better for a cutting board?

    Neither is better across the board. Maple is harder and cheaper, which suits heavy daily chopping. Walnut is darker, hides stains better, and looks richer as a serving board. Both are tight-grained hardwoods that are widely used for food surfaces.

    Is walnut safe for cutting boards?

    Yes. Black walnut is a standard cutting board wood and is considered safe for food contact. People with tree nut allergies should be cautious with any walnut board, so mention it if you are gifting one or cooking for someone with a nut allergy.

    Will a maple cutting board stain?

    It can. Pale maple shows pigments from beets, turmeric, berries and wine. These are usually surface marks that fade with washing or come out with a light sanding and fresh oil, so they are cosmetic rather than a sign of damage.

    If you are ready to choose a wood, size and style, request a quote at /commission/.
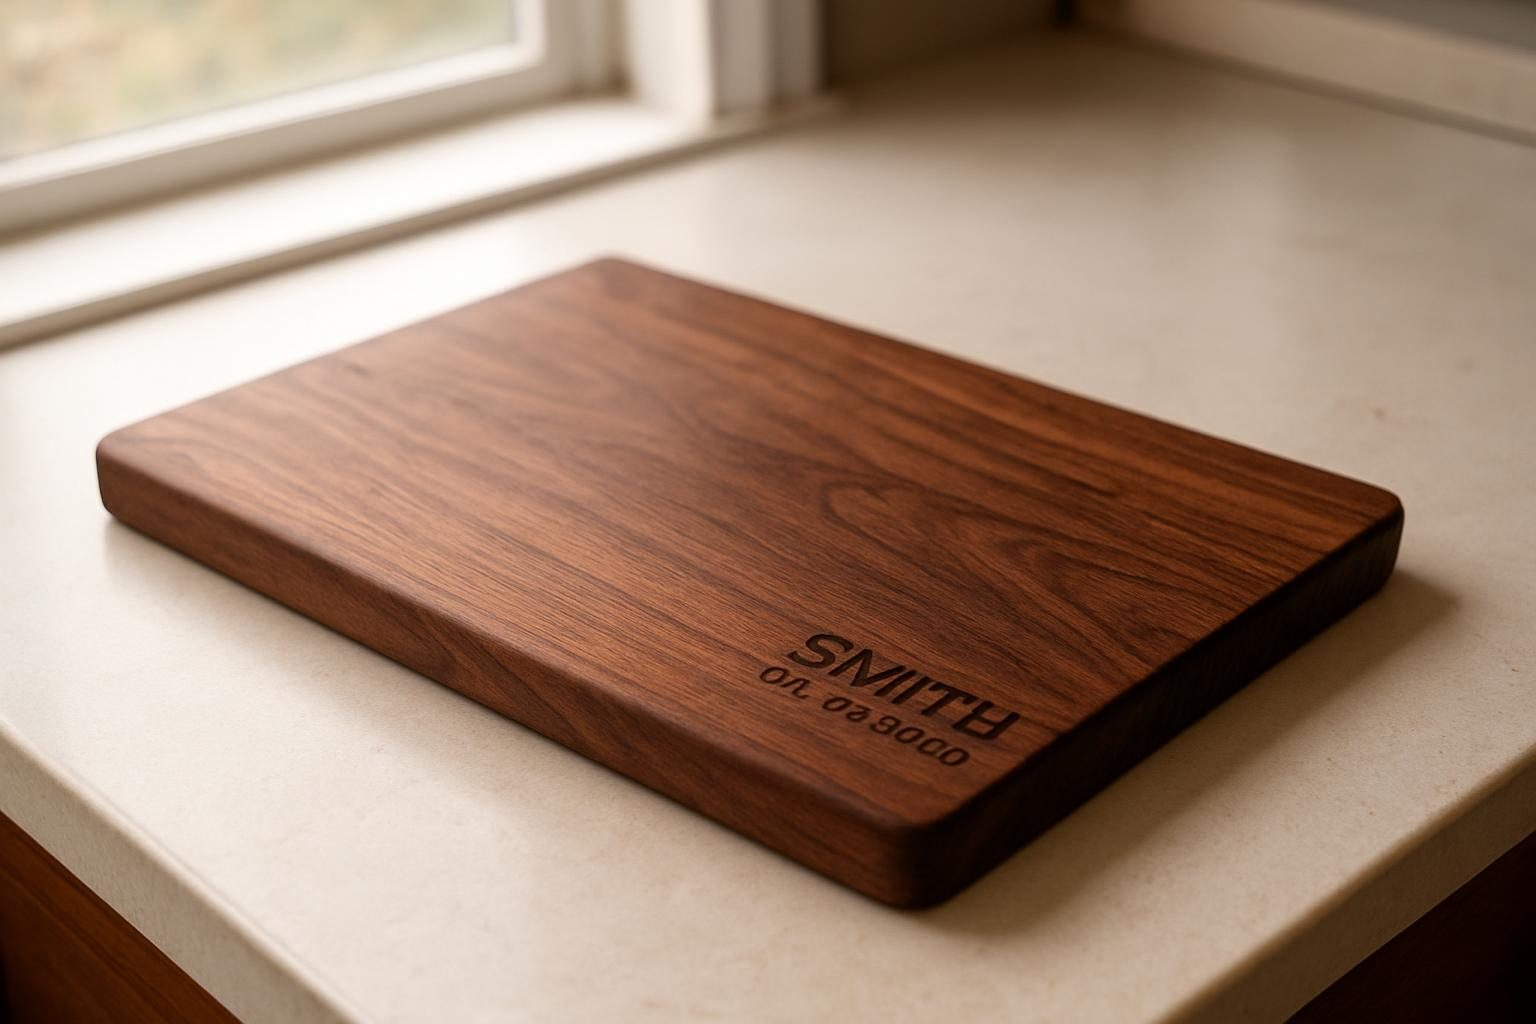
  • Personalized Cutting Boards as Wedding and Housewarming Gifts

    Personalized Cutting Boards as Wedding and Housewarming Gifts

    The short version

    • Keep engraving short: a surname, a date and maybe one small line. Less reads better and cuts cleaner.
    • Walnut, hard maple and cherry all engrave well and hold up to daily use. Pick by the recipient’s kitchen, not just color.
    • A board 12 x 18 inches or larger is a real working board; smaller ones are fine for serving but frustrating for chopping.
    • Tuck in a one-page care card so the board is still beautiful in ten years.
    • Order early: engraved gifts take shop time, and wedding dates don’t move.

    A cutting board is a good gift for the simple reason that it gets used. A vase gets set on a shelf, but a board comes out for dinner, for the holiday ham and for the cheese plate when company stops by. Put a name and a date on it and it turns into the thing a couple reaches for and remembers who gave it.

    This guide covers the three decisions that matter when you give a personalized cutting board: what to engrave, what wood to choose and how to make sure the recipient takes care of it. We make boards in the shop starting at $95, and the advice below comes from what holds up in real kitchens.

    What to Engrave on a Personalized Cutting Board

    The best engraving is short enough to read in a glance. A family surname with an established date is the classic for weddings, and it works because it looks like it belongs on a board rather than on a trophy. For a housewarming, a street name, a house number or a simple “Home Sweet Home” tends to land well.

    Here are the layouts that tend to work best:

    • Surname and year: “The Hendersons, Est. 2025.” Reads cleanly and ages well.
    • Initials and date: A monogram with the wedding date underneath. Good for couples who keep different last names.
    • Address or coordinates: Works for housewarmings and says “this is your place” without being sentimental.
    • A short line: A favorite saying, kept to a handful of words. Long quotes get cramped and hard to read.
    • A handwritten signature or recipe: Can be engraved from a clear scan. Check the stroke width first; hairline handwriting can blur in the wood.

    Keep the engraving to one face of the board, ideally the side you’d use for serving. Flip it over and the other side stays clean for chopping, so nobody has to choose between sentiment and function.

    The best engraving is the one you can read from across the kitchen.

    Choosing the Wood for the Gift

    Wood choice changes how the engraving looks and how the board lives. Walnut is dark, so engraving shows as a soft, low-contrast mark that looks refined. Hard maple is pale, so engraving reads sharp and high-contrast, which is better if the recipient wants the words to stand out.

    WoodJanka hardnessEngraving lookBest for
    Hard mapleabout 1,450High contrast, crispHeavy daily chopping, bright kitchens
    Black walnutabout 1,010Subtle, tone on toneServing boards, dark or warm kitchens
    Cherryabout 950Warm, medium contrastGifts that will deepen in color with age
    White oakabout 1,360Medium, visible grainRustic or farmhouse kitchens

    For a deeper comparison of what’s safe and what to skip, our guide to the best woods for cutting boards covers the food-safety side. Our wood guide shows the species side by side if you want to compare grain and color before you decide.

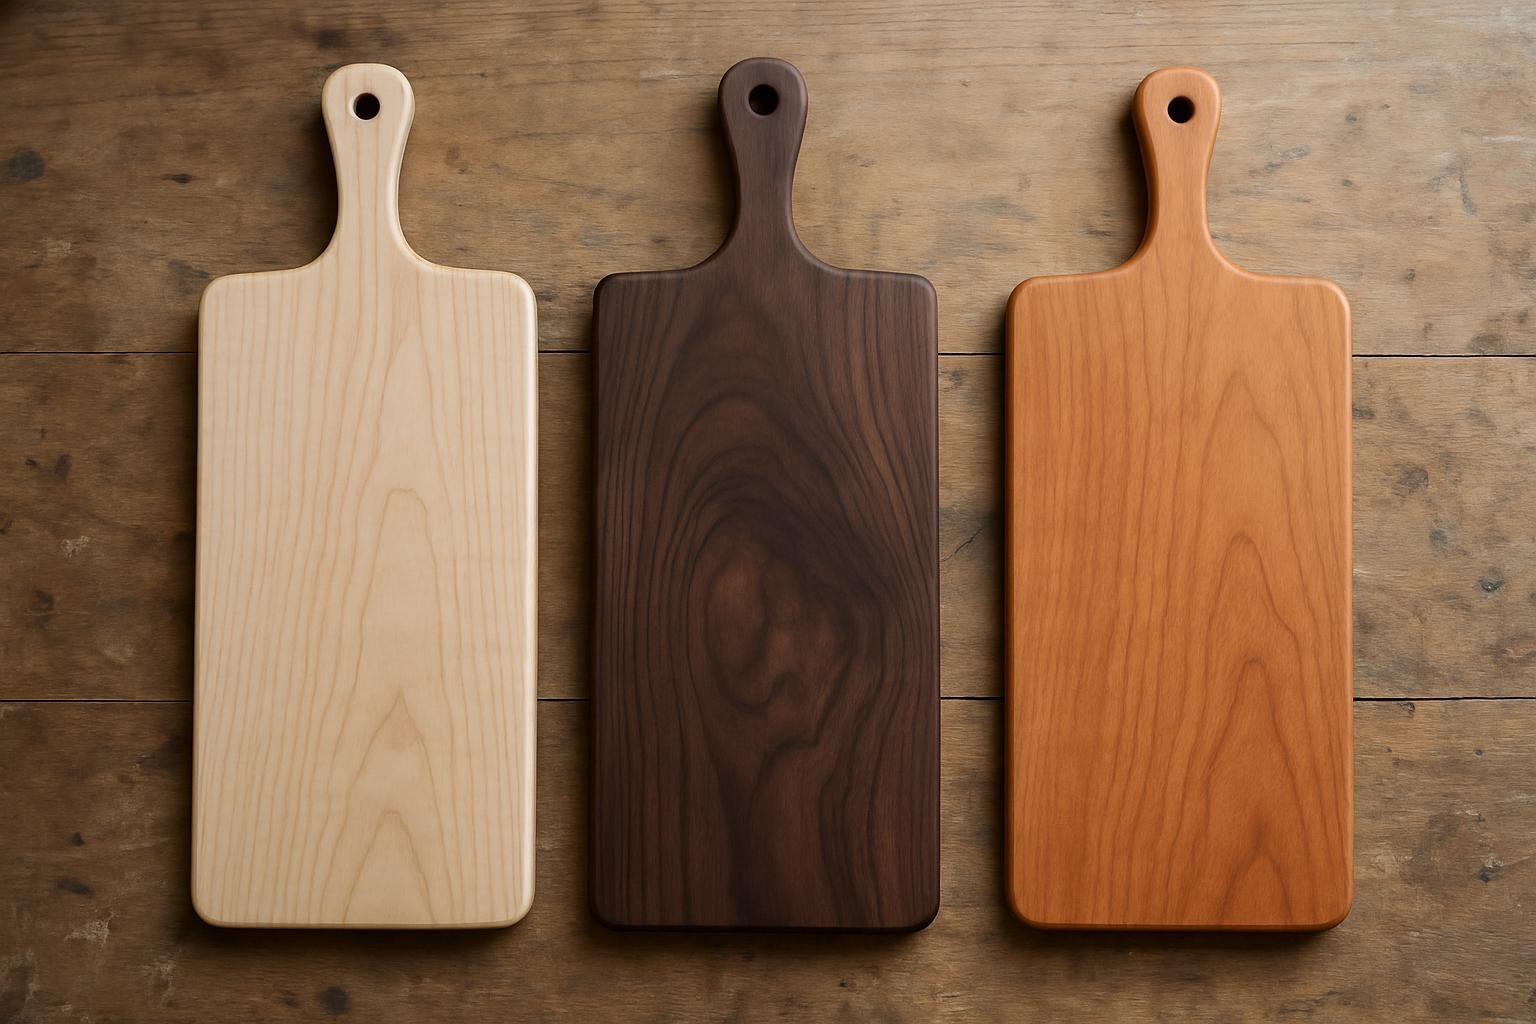
    Side-by-side hard maple, walnut and cherry cutting boards showing different wood tones

    Size and Construction: Edge Grain or End Grain

    Size is where gift boards most often go wrong. A board under about 10 x 14 inches is a serving piece; it looks nice on a table but a whole chicken or a pile of onions will crowd it. For a board someone will really cook on, 12 x 18 inches is a sensible minimum, and 15 x 20 gives a serious cook room to work.

    Thickness matters too. Around 1.5 inches is a good working thickness: heavy enough to stay put on the counter, thick enough to be flattened or refinished later. Go thinner and it can cup; go much thicker and it gets awkward to lift and store.

    Construction comes down to edge grain versus end grain. Edge grain is the more affordable option and is plenty durable. End grain is gentler on knife edges and shows a checkerboard pattern, but it costs more and needs a little more oil. We break the trade-offs down in end grain vs edge grain cutting boards, which is worth a read if you’re deciding for a keen cook.

    Shop tip: If you don’t know how the recipient cooks, go edge grain in walnut or maple at 12 x 18 inches or larger. It suits nearly everyone, it’s forgiving about care and it leaves room for a clean engraving.

    A board that’s too small to use ends up as decoration, and that defeats the point of the gift.

    The Care Card: Tuck One In

    Most boards that look tired after a year weren’t badly made; they were never oiled or they spent a night in the dishwasher. A short care card fixes that, and it’s the most useful thing you can add to the gift. Keep it to a single page that stays in the kitchen drawer.

    Here’s what the card should say:

    • Wash by hand with mild soap and warm water, then dry it right away with a towel.
    • Never soak it and never put it in the dishwasher. Heat and standing water warp and split wood.
    • Oil it with food-grade mineral oil when the surface looks dry or pale, about once a month at first.
    • Stand it on edge to dry so air reaches both faces evenly.
    • Sand out knife marks with fine paper and re-oil if the surface gets rough.

    For the full routine, point them to how to oil and clean a wood cutting board. You can also include a small bottle of mineral oil with the gift, which turns good advice into something they can do that same weekend.

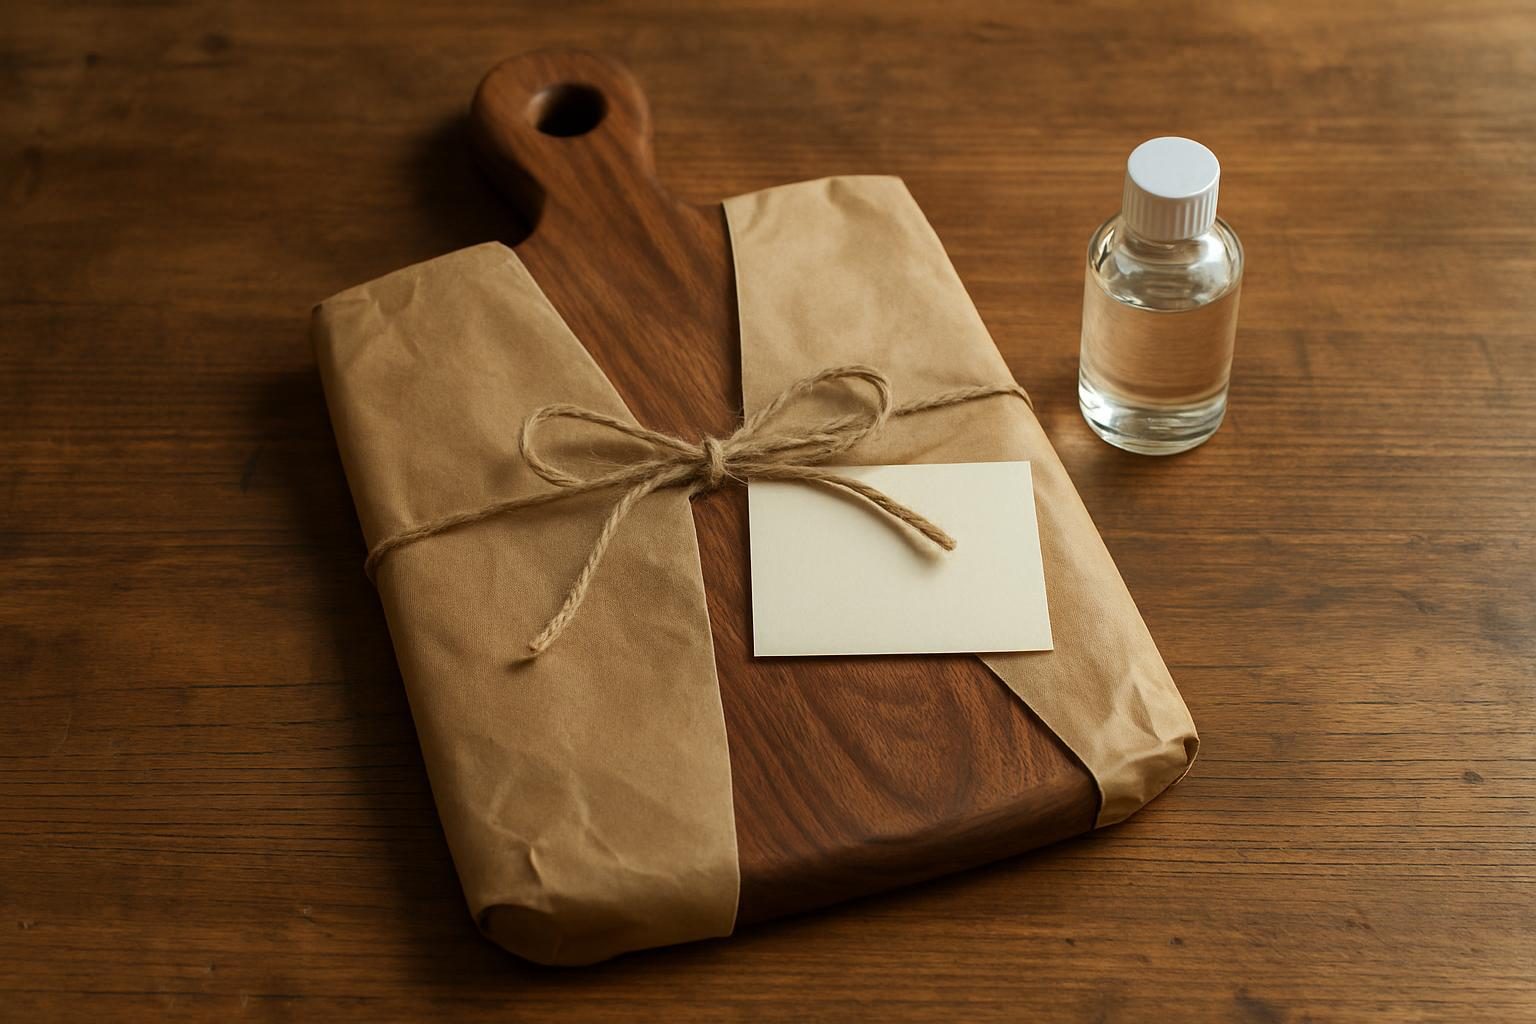
    Cutting board wrapped in kraft paper with a care card and a small bottle of mineral oil

    Timing, Budget and Ordering

    Plan on a few weeks of lead time for an engraved board, longer around wedding season and the holidays. Our boards start at $95 and the price climbs with size, wood and construction; a large end grain walnut board costs noticeably more than a small maple serving board. If the gift is for a wedding, order at least a month ahead so there’s room for a proof of the engraving.

    Boards ship anywhere in the US, so the recipient doesn’t need to be nearby. If you’re local, we also serve Jacksonville and the rest of Onslow County for furniture pickup and delivery, so a board and a larger piece can often be handled together. You can browse sizes and options on our cutting boards page.

    One last thought on budget: a well-made board is a gift that ages in the recipient’s favor. It darkens a little, picks up character and gets better with oil. That’s a lot to say for something you can wrap in tissue paper.

    FAQ

    What is the best thing to engrave on a wedding cutting board?

    A surname and the wedding year is the safest and most lasting choice. If the couple has different last names, use initials and the date. Keep it short so the engraving stays crisp and readable.

    Is an engraved cutting board still safe to cut on?

    Yes. Engraving removes a shallow layer of wood on one face and doesn’t affect food safety. Many people use the engraved side for serving and the plain side for chopping, which keeps the lettering looking sharp.

    How big should a personalized cutting board gift be?

    For real cooking, aim for at least 12 x 18 inches and about 1.5 inches thick. Smaller boards around 10 x 14 inches work well as serving or cheese boards but feel cramped for chopping.

    If you’d like a board made for a wedding or housewarming, you can request a quote at /commission/.

  • How to Oil and Clean a Wood Cutting Board

    How to Oil and Clean a Wood Cutting Board

    A wood cutting board is one of the few kitchen tools that gets better with care and worse with neglect. The care is simple: wash it right, dry it on edge, and put oil back into it when it starts to look thirsty. You do not need a special kit or a weekend project.

    The short version

    • Oil a new board once a day for the first week, then about once a month, or whenever it looks dry or pale.
    • Food-grade mineral oil is the cheap, reliable choice. Board butter (oil plus wax) adds a bit of water resistance on top.
    • Wash by hand with warm water and a little dish soap, then stand it on edge to dry. Never soak it or run it through the dishwasher.
    • Sanitize raw-meat boards with white vinegar or a diluted bleach rinse, then dry completely and re-oil as needed.

    Why a Wood Board Needs Oil at All

    Wood is a bundle of tiny tubes that were built to carry water. Left bare, those pores soak up whatever you put on the board: water, juice, raw meat liquid, beet stain. Oil fills the pores with something that does not spoil or swell, so less of the bad stuff gets in.

    A well-oiled board also moves less. Wood swells when it takes on moisture and shrinks as it dries, and that cycling is what causes cracks and warped glue joints over time. Keeping the surface sealed with oil slows the swings, which is the single biggest thing you can do for a board’s lifespan.

    The same logic applies to bigger pieces, which is why we talk about it in our guide to caring for a solid wood dining table. A cutting board just gets the hard-use version: knives, water and heat all in one afternoon.

    Mineral Oil vs Board Butter: What to Use

    Both work. The right pick depends on how much effort you want to put in and what your kitchen looks like.

    ProductWhat it isBest forRough cost
    Food-grade mineral oilThin, odorless, never goes rancidNew boards, deep conditioning, dry boards$6 to $12 per 12 oz bottle
    Board butter / cutting board waxMineral oil plus beeswax or carnaubaMaintenance coats, extra water resistance$10 to $20 per tin
    Plain beeswaxHard natural waxTopping off over oil only$8 to $15
    Cooking oils (olive, vegetable)Plant oils that can go rancidAvoidn/a

    Mineral oil is sold as a laxative in drugstores, and that same bottle is what you want. Look for “USP” or “food grade” on the label. It is thin enough to soak deep and it will not turn sour.

    Skip olive, vegetable and other cooking oils. They stay liquid in the wood, oxidize over weeks, and leave a sticky film that smells like old fryer grease. Coconut oil sold as “fractionated” is stable and fine, but it costs more than mineral oil for no real gain.

    Mineral oil does the work, and wax just helps it stay put.

    How to Oil a Cutting Board, Step by Step

    Start with a clean, completely dry board. If you just washed it, give it at least a few hours on edge so the surface is bone dry. Oiling over damp wood traps moisture inside.

    1. Lay the board on a towel or a baking sheet to catch drips.
    2. Pour a generous pool of mineral oil on the face, roughly 2 to 3 tablespoons for a 12 x 18 inch board.
    3. Spread it with a clean cloth or your hand, working with the grain. Cover the face, both edges, the ends and the back.
    4. Let it soak for 20 to 30 minutes. If any spot goes dull fast, add more there.
    5. Repeat until the wood stops drinking it and the surface stays glossy and wet-looking.
    6. Wipe off the excess with a dry cloth and let the board rest for a few hours before use.

    A brand new board is thirstiest. Oil it once a day for the first 3 to 5 days, then monthly. End grain boards soak up noticeably more than edge grain, since the open pores act like a sponge. If you are deciding between constructions, our comparison of end grain vs edge grain cutting boards covers the care difference in detail.

    Tin of board butter and a bottle of mineral oil next to a walnut cutting board

    When to Add Board Butter

    Once the board is saturated with mineral oil, a coat of board butter finishes the job. The wax sits in the surface pores and helps water bead up instead of soaking in. It also gives the board a soft, satin feel that plain oil does not.

    Rub a small amount in with a cloth, working in circles and then with the grain. Let it sit for 15 to 20 minutes, then buff with a clean dry cloth until it stops feeling tacky. A tin that costs $15 will do dozens of boards.

    You can make your own by melting 1 part beeswax into 4 parts mineral oil in a double boiler, then letting it set in a jar. It costs a few dollars and works as well as the store-bought tins.

    Shop tip: The easiest way to know when a board is due is the water test. Sprinkle a few drops of water on the face. If they bead up, the board is fine. If they darken the wood and soak in within a few seconds, it is time to oil.

    How to Clean a Cutting Board After Every Use

    Daily cleaning is quick. Scrape off food, wash the board with warm water and a small amount of dish soap, and rinse it right away. A soft sponge or brush is plenty. Then wipe it down with a towel and stand it on its edge so air reaches both faces.

    Never soak a board in the sink and never put it in the dishwasher. Long exposure to water and heat swells the fibers unevenly, which is how boards cup, crack and open up at the glue lines. Drying flat on the counter does the same thing slowly, because the bottom stays damp while the top dries.

    For stuck-on residue, sprinkle coarse salt on the board and scrub with half a lemon, cut side down. The salt abrades, the acid lifts stains and the juice leaves it smelling fresh. Rinse, dry and give it a light coat of oil afterward, since lemon and soap both strip a bit of the surface.

    Five minutes of washing and drying beats any amount of fixing later.

    How to Sanitize a Wood Cutting Board

    After raw chicken, pork or fish, wash first, then sanitize. Washing removes the bulk of the residue, and sanitizer works much better on a clean surface. Wood is not the germ trap people fear; its fibers pull bacteria down and hold them there, and studies of wood and plastic boards have generally found wood performs as well or better once it is cleaned and dried.

    • White vinegar: Wipe the board with undiluted white vinegar, let it sit for a few minutes, then rinse and dry. Gentle and food-safe.
    • 3% hydrogen peroxide: Spray or wipe on, wait 5 minutes, rinse and dry. Good for light bleaching of stains too.
    • Diluted bleach: Mix about 1 tablespoon of unscented household bleach per gallon of water. Wipe on, wait 2 minutes, rinse thoroughly and dry. Use sparingly, since it dries out the wood.

    Whichever you choose, finish by standing the board on edge until it is fully dry, then add a thin coat of oil if the surface looks pale. Sanitizers pull some oil out along with the germs, so plan on conditioning a little more often if you use them regularly.

    Clean wood cutting board standing on its edge to air dry next to a kitchen sink

    Fixing Odors, Stains and Rough Spots

    Onion and garlic smells usually respond to the salt-and-lemon scrub above. For stubborn odors, make a paste of baking soda and a little water, scrub it in, let it sit for 10 minutes and rinse. Dry the board completely afterward.

    Dark stains from berries, beets or wine often lift with hydrogen peroxide or a light sanding. If a board feels fuzzy or rough, it is raised grain from water exposure. Sand lightly with 220 grit, wipe off the dust and re-oil, and it will feel smooth again.

    Deep knife grooves and a general worn look are also fixable with sand and oil. Start at 120 grit to level the surface, move up to 180 and then 220, and finish with the full oiling routine. A good board can be refreshed this way many times, which is part of why a well-made one outlasts a drawer full of plastic.

    Species matters a little too. Dense hardwoods like hard maple, which comes in around 1,450 on the Janka scale, resist deep grooves and soak up oil more slowly than softer woods. Our rundown of the best woods for cutting boards explains what to look for.

    What Not to Do

    A few habits cause most of the damage we see on neglected boards:

    • Leaving the board wet or sitting in a puddle on the counter.
    • Using the dishwasher, even once.
    • Oiling with cooking oil that goes rancid.
    • Letting it sit next to the stove or in direct sun, where heat dries and cracks the wood.
    • Skipping oil for a year and then expecting one coat to fix it.

    Do the basics and a solid hardwood board will last decades. If you want a board built to be used and re-oiled for that long, take a look at our handmade cutting boards, which start at $95 and ship across the US.

    FAQ

    How often should I oil my cutting board?

    Oil a new board daily for the first week, then roughly once a month under normal use. If you wash it often or the wood looks pale and feels dry, oil it sooner. The water-bead test is the most reliable guide.

    Is mineral oil safe on cutting boards?

    Yes, as long as it is labeled food grade or USP. It is odorless, tasteless and does not go rancid, which is why it is the standard choice. Avoid mineral oil that is not labeled for food use, such as machine or lamp oil.

    Can I use olive oil or vegetable oil instead?

    It is better not to. Cooking oils stay in the wood and oxidize over time, leaving a sticky film and a stale smell. Mineral oil or a mineral oil and beeswax blend gives better results for pennies.

    If you want a board or a larger piece built to last, you can request a quote at /commission/.

  • The Best Woods for Cutting Boards (and Ones to Avoid)

    The Best Woods for Cutting Boards (and Ones to Avoid)

    If you’re shopping for a cutting board, the species matters more than most listings let on. Some woods hold up to years of knife work and wash cycles. Others look nice in a photo and then stain, split or soak up everything you cut on them.

    This is how a woodworker thinks about it: grain structure first, hardness second, and toxicity worries a distant third. Most of what gets repeated online about toxic woods is either overblown or aimed at the wrong thing.

    The short version

    • Closed-grain hardwoods like hard maple, walnut and cherry are the best choices for cutting boards.
    • The sweet spot for hardness is roughly 900 to 1,500 on the Janka scale: hard enough to last, soft enough to spare your knives.
    • Open-pored woods like red oak and ash trap moisture and food, so skip them for boards.
    • Most wood “toxicity” warnings are about sawdust, not a finished board you cut on.
    • Care and a food-safe finish matter as much as the species you pick.

    Why closed grain matters most

    Every hardwood is made of tiny tubes that carried water and nutrients when the tree was alive. In some species those pores are small and tight, which we call closed grain. In others they’re large and open, like a bundle of straws.

    On a cutting board, open pores are a problem. They soak up liquid, hold onto food residue and take longer to dry, which is exactly what you don’t want near raw meat or wet produce. Closed-grain woods present a tighter surface that wipes clean and dries faster.

    This is why the traditional board woods are all closed-grain hardwoods: maple, walnut, cherry, beech. It isn’t a style choice. It’s the reason they’ve worked in kitchens for generations.

    Hardness: the Goldilocks zone

    Hardness is measured on the Janka scale, which records how much force it takes to push a steel ball halfway into the wood. A higher number means a harder wood. For cutting boards, harder isn’t automatically better.

    A very hard board dulls your knife edge faster and can feel unforgiving under the blade. A very soft one scars quickly and wears out. The middle ground, roughly 900 to 1,500 lbf, gives you a surface that resists gouges and still lets a knife edge bite in slightly and recover.

    WoodJanka (lbf)GrainGood for boards?
    Hard maple1,450ClosedYes, the classic choice
    Black walnut1,010Closed to semi-closedYes, gentle on knives
    Black cherry950ClosedYes, and it darkens with age
    Beech1,300ClosedYes, common in Europe
    Red oak1,290Very openNo, pores are too large
    White ash1,320Open (ring-porous)Not recommended
    Pine / cedar380 to 900Varies, resinousNo, too soft and resinous

    Janka numbers are averages and vary from board to board, so treat them as a guide rather than a guarantee. The pattern holds, though: the good board woods cluster in that middle range.

    A good board is hard enough to last and soft enough to be kind to your knives.

    The woods we’d put on your counter

    Hard maple is the benchmark. It’s pale, tight-grained, durable and neutral, so it doesn’t compete with food or leave color behind. If you want one safe answer, this is it.

    Black walnut is the pick if you like a darker board. At about 1,010 lbf it’s noticeably easier on knife edges than maple, and the chocolate-brown color hides stains well. Cherry sits close to walnut in hardness and starts a light reddish tan before deepening to a rich red-brown over months of light exposure.

    Many of our boards combine these in stripes or checkerboard patterns, since they glue up cleanly and contrast well. If you want to see what’s available, our cutting boards page has current options, and the wood guide compares the species side by side.

    Close-up of closed-grain maple versus open-pored red oak end grain

    Woods to avoid, and why

    Red oak is the one people ask about most, because it’s a gorgeous, common furniture wood. The trouble is its pores are so large you can sometimes blow air through a short piece of end grain. On a cutting board that means trapped moisture and food, so we leave it for tables and keep it away from the kitchen.

    Ash behaves similarly. It’s ring-porous, with a band of large pores in each growth ring, so it holds liquid in a pattern that’s hard to clean out. Softwoods like pine, spruce and cedar are the other group to skip. They’re soft enough to scar badly, and resinous species can leach sap or flavor into food.

    • Red oak and white oak (for boards): large open pores. White oak has tyloses that plug its pores, which helps with liquids, but it’s still too coarse for a knife surface.
    • Ash: open pores and a harder, more abrasive feel.
    • Pine, spruce, cedar: too soft, and resin can taint food.
    • Exotic oily woods like teak: the natural silica in teak dulls knives quickly.
    Shop tip: Rub a drop of water on a bare board. If it sinks in and darkens the wood within a few seconds, the surface is too open or it needs oiling. A well-finished closed-grain board will bead the water for a moment before it soaks in slowly.

    Most wood toxicity warnings are about breathing sawdust, not slicing an onion.

    The toxicity myths, sorted out

    You’ll see lists of “toxic woods” that make every species sound dangerous. The honest picture is narrower. Most of those warnings concern the sawdust and fine particles woodworkers breathe while cutting and sanding, which can cause allergic reactions or respiratory irritation. That’s a shop-safety issue, not a kitchen one.

    Once a board is finished and sanded smooth, the species we’ve listed here are widely used for food contact. Black walnut gets singled out because some people have tree-nut allergies. If anyone in your home has one, it’s worth choosing maple or cherry instead and asking the maker what’s in the board.

    The more practical food-safety questions are about the finish and the glue. We use food-safe mineral oil and wax finishes on boards and a waterproof glue rated for food contact. Avoid anything with a film finish like polyurethane on a cutting surface, because knife cuts will chip it into your food. Our post on hardwax oil vs polyurethane explains the difference for furniture, and the same logic applies to boards.

    Finished walnut and maple cutting board being oiled with food-grade mineral oil

    Species, grain direction and care

    The wood isn’t the only decision. How the board is built changes how it wears. End grain boards, where the cut face shows the growth rings, are gentler on knives and can look healed after a cut, but cost more and need more oiling than edge grain. We break that down in End Grain vs Edge Grain Cutting Boards.

    Whatever you choose, care is simple. Wash with mild soap and warm water, dry it standing on its edge, and never soak it or run it through a dishwasher. Oil it with food-grade mineral oil when the surface starts to look dry and pale, roughly once a month at first.

    Pricing on our boards starts at $95 and climbs with size, thickness and pattern complexity. Shipping is available across the US, so you don’t need to be local. If you’re ordering furniture alongside a board, we deliver around Jacksonville and the rest of Onslow County.

    How to choose

    If you want a single recommendation, go with hard maple for an all-purpose board or black walnut if you prefer a darker look and gentler knife contact. Cherry is the nice middle option when you want warmth and character. All three are closed-grain, hard enough to last, and well within the safe range for a kitchen.

    Skip the open-pored woods and the softwoods, and don’t let a scary toxicity list talk you out of a solid maple or cherry board. Ask the maker about the finish and glue, and you’ll have covered the questions that actually matter.

    FAQ

    What is the single best wood for a cutting board?

    Hard maple is the safest all-around answer. It’s closed-grain, around 1,450 lbf on the Janka scale, neutral in color and proven over a long time in kitchens. Walnut and cherry are close behind and a bit easier on knife edges.

    Is walnut safe to use for cutting boards?

    Yes, for most people. Walnut is closed enough to clean well and is widely used for food boards. If someone in your household has a tree-nut allergy, choose maple or cherry instead to be cautious.

    Can I use oak for a cutting board?

    We don’t recommend it. Red oak has very large open pores that trap moisture and food, and even white oak is too coarse for a knife surface. Oak is a great wood for tables, just not for boards.

    If you’d like a board made from the species that fits your kitchen, request a quote at /commission/.

  • End Grain vs Edge Grain Cutting Boards: Knife Wear, Care and Price

    End Grain vs Edge Grain Cutting Boards: Knife Wear, Care and Price

    The short version

    • End grain boards are easier on knife edges and hide cut marks well, but they cost roughly 1.5 to 3 times more than an edge grain board of the same size.
    • Edge grain boards are lighter, flatter, easier to make well and easier to care for, and they hold up fine for daily cooking.
    • Both need food-safe oil. End grain drinks more of it, so plan on oiling it more often.
    • Species matters as much as construction. Hard maple, walnut and cherry are the usual good choices.
    • If you cook a lot and own good knives, end grain is worth it. If you want a solid everyday board at a lower price, edge grain is the sensible pick.

    What the Two Constructions Actually Are

    A tree grows as a bundle of long fibers, like a bundle of straws. In an edge grain board, strips of wood are turned on their sides and glued together, so the knife meets the long side of those fibers. You see long stripes running the length of the board.

    In an end grain board, those strips are cut crosswise into short blocks and turned upright, so the knife meets the cut ends of the fibers. You see a checkerboard or mosaic of small squares. That one difference drives almost everything else in this article: knife feel, how the board ages, how it’s made and what it costs.

    Knife Wear: What the Edge Actually Feels

    When a blade enters an edge grain board, it cuts across the fibers and has to sever them. When it enters an end grain board, it slips between the upright fibers, which then close back up. This is why end grain boards show fewer scars and feel softer under the blade.

    The practical result is that an edge on a good kitchen knife stays sharp somewhat longer on end grain. The difference is real but not dramatic. Most people notice it as a quieter, less “stiff” feeling when chopping, not as a night-and-day change in how often they sharpen.

    Wood species plays a part too. Hard maple measures about 1,450 on the Janka hardness scale, walnut about 1,010 and cherry about 950. All three are gentle enough for knives. Much harder woods, or boards with embedded grit or glue lines gone wrong, are what actually dull an edge.

    The board that is kind to your knife is the one you will actually keep using.

    Edge grain and end grain cutting boards side by side showing the difference in grain pattern

    Durability and How Each Board Ages

    End grain boards are often called “self-healing,” and that is partly marketing, but there is truth in it. Light knife cuts tend to close up rather than stay open. Over years, an end grain board usually looks better than an edge grain board with the same amount of use.

    Edge grain boards show their wear more plainly. Cut lines accumulate on the surface, though a pass with a card scraper or sandpaper brings the surface back easily. They are also very stable and flat, which makes them good for rolling dough or carving a roast.

    Here is how the two compare on the things people ask about most:

    FactorEdge grainEnd grain
    Knife feelFirm, fine for daily useSofter, quieter, gentler on edges
    Cut marksShow more over timeHide well
    Weight (12 x 18 x 1.5 in maple)About 4 to 5 lbAbout 5 to 6 lb at 2 in thick
    Oil absorptionModerateHigh, thirsty at first
    Risk of crackingLowHigher if neglected or soaked
    Typical thickness1.25 to 1.75 in1.5 to 2.5 in
    Relative priceLowerRoughly 1.5 to 3 times higher

    Care: Oil, Water and What to Skip

    Neither board goes in the dishwasher, and neither should sit in a sink of water. Wash with warm water and a little dish soap, rinse, wipe and stand the board on its edge so air reaches both faces. Flat on a wet counter, one face stays damp, swells and can eventually warp or crack.

    Oil is where the two constructions differ most. End grain acts like a bundle of tiny straws and pulls oil in deeply, so a new board may want several coats in its first week, then a fresh coat roughly monthly. Edge grain is less thirsty, and a coat every month or two is usually plenty.

    Use food-safe mineral oil, or a mineral oil and beeswax blend for a bit more water resistance. Skip cooking oils like olive or vegetable oil, which can go rancid. The same broad ideas apply to our guide to caring for a solid wood table, though a cutting board gets far more water and abuse.

    Shop tip: Sand-free test for oil: sprinkle a few drops of water on the board. If they bead up, the surface is still protected. If the water soaks in and darkens the wood, it is time to oil.

    Oiling a board takes five minutes. Replacing a cracked one does not.

    Mineral oil being wiped onto a maple cutting board with a cloth

    Price: Why End Grain Costs More

    End grain boards take more time and more wood. Strips are glued up, cut crosswise into blocks, rotated and glued again, and each extra glue-up has to be flattened. The grain direction on the cut face means surfaces need careful sanding and the board is more prone to movement, so the maker has to be precise.

    There is more waste too, since you end up with offcuts from both cutting stages. That is why end grain boards often run roughly 1.5 to 3 times the price of an edge grain board with the same footprint. Our cutting boards start at $95, and the price climbs with size, thickness, species and how complex the pattern is.

    • Size: a 12 x 18 inch board and a 15 x 20 inch board are different amounts of wood and labor.
    • Thickness: thicker end grain boards are sturdier but cost more.
    • Species: walnut and cherry usually cost more than maple.
    • Extras: juice grooves, handles, feet and inlays all add time.

    Which One Should You Buy?

    Pick end grain if you cook most nights, own knives you care about and want a board that looks good for years. Pick edge grain if you want a lighter, simpler board at a lower price, or if you also use the board for serving, rolling dough or carving.

    Many households end up with both: an edge grain board for general prep and a thicker end grain board as the main chopping block. If you are weighing wood species, our wood guide compares hardness, color and grain so you can match the board to your kitchen.

    You can browse the current options on our cutting boards page. Boards ship across the US. If you are in Jacksonville, Hubert, Swansboro, Sneads Ferry, Richlands or around Camp Lejeune and are ordering furniture with a board, local pickup and delivery are available for the furniture.

    One last point on safety: a board that gets deep, fuzzy knife scars or smells off after washing is worth refinishing or retiring, whichever construction it is. A clean, well-oiled board of either type is a safe surface for food.

    FAQ

    Is an end grain cutting board really better for knives?

    It is gentler, yes. The blade slips between upright fibers rather than cutting across them, so the edge tends to last somewhat longer. The gap is modest, and a well-made edge grain board in maple or walnut is still a good surface for good knives.

    Do end grain boards crack more often?

    They can, mainly if they are left wet, put through a dishwasher or allowed to dry out for long periods. Because the fibers are exposed on the surface, they take on and lose moisture faster. Regular oiling and drying the board upright keeps the risk low.

    How often should I oil a wooden cutting board?

    Give a new end grain board several coats in the first week, then roughly once a month. An edge grain board usually does well with a coat every month or two. When water stops beading on the surface, it is time for another coat.

    If you would like a cutting board built to your size and wood choice, you can request a quote at /commission/.